Since spying on citizens’ daily communication has shifted from being a rumour for paranoids to being a proven fact, some people think a lot harder about what they can do to preserve their privacy. With E-Mail still being the number one form of communication at the internet, this is one of the most obvious starting points. Due to the nature of the SMTP protocol, spying cannot be shut-down completely, even with content encryption. However, one aspect that can be worked on, is mail storage. Spying on each mail transferred via SMTP is quite expensive for an attacker while just fetching information from a multi-GB mailbox with years worth of social links and information is very cheap.
When relying on secure physical storage, most hosted mail services are not acceptable. They either make money from user data, closely work together with intelligence agencies, cannot provide an acceptable privacy policy - or simply are too expensive for personal usage. A possible solution is to use a local “at home” mail storage. Sadly, just putting some machine as a IMAP/SMTP host to a residential internet line means a couple of drawbacks. For one, most consumer internet connections will use dynamic IP addresses and force regular reconnections/assignments. Second, most telcos don’t offer proper reverse-resolution of the IP, many SMTP hosts use that to identify spammers as well as blocking whole IP ranges which are known for consumer internet connections.
Dynamic IP addressing could be worked around by using popular DynDNS services. However, a DNS MX entry must not be a CNAME but a “real” address. Some mail providers (e.g. GMX) check for this and deny taking mail from such hosts. The issue regarding reverse-resolution can be tackled by buying some mail re-direction services (e.g. dnsexit, dnsmadeeasy) that will relay your mail, but will set you back at least $25 a year with limited confidence to the “privacy” concern and limitations to mail throughput/features.
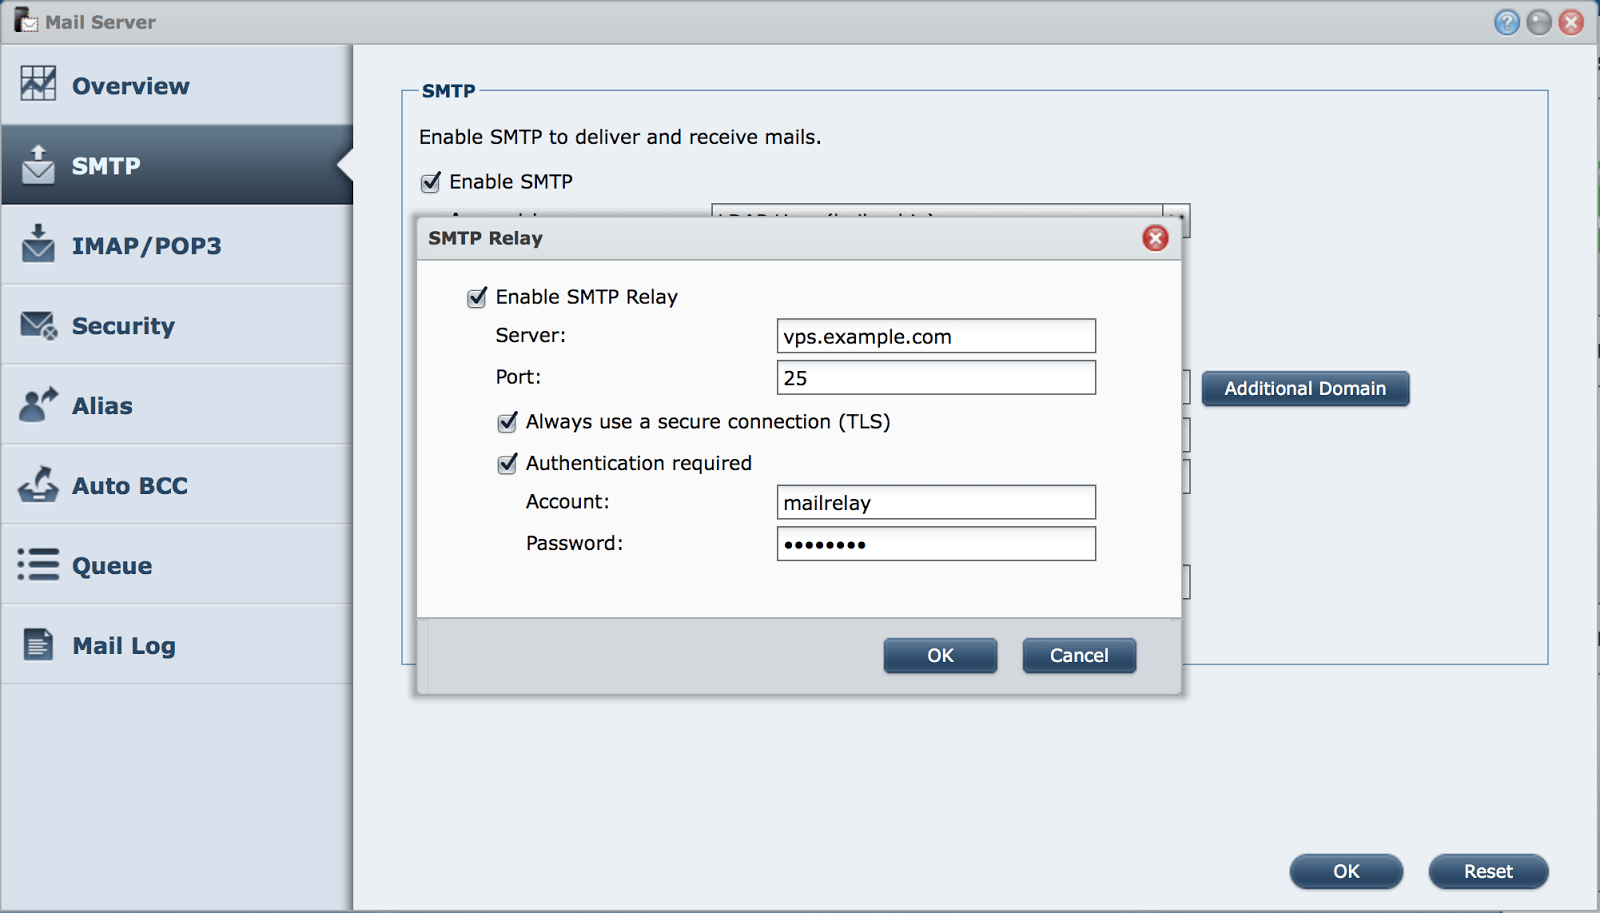
For me, the best solution has been using a small virtual server (VPS) as a SMTP relay. This gives full control on mail services, features and security. At home, i use a Synology DS214 for IMAP storage and SMTP submission. This box sends all mail to my VPS which then relays that mail to the destination recipient. The other way around it works the same way: incoming mail for my domain is relayed to the DS214 at home. The VPS costs me about €3 a month and of course allows more than just relaying mail. I’d like to share the configuration details with you.
Network hosts
client
The clients mail application uses “ds214.example.com” as IMAP and SMTP server.
ds214.example.com
This host is located at home and uses a residential ADSL line. It uses a dynamic DNS service to update its dynamic IP for “ds214.example.com”. Ports 25 and 993 are forwarded by the ADSL router to allow access by the client and the mail relay (vps.example.com).
vps.example.com
This host does the mail relaying. It is added as DNS MX entry for “example.com”, it’s static IP address reversely resolves to example.com
mx.otherhost.com
Other mail providers hosts just communicate with “vps.example.com”, not knowing anything about it’s relay functionality.
DS214 configuration
This is Synology specific, but may easily be achieved with other MTAs as well.

Postfix configuration
The MTA is running Postfix and Postgrey at vps.example.com is configured like this:
1 | smtpd_banner = $myhostname ESMTP $mail_name (Debian/GNU) |
Relay domains and target hosts are configured at /etc/postfix/transport. In this case, all mail to “example.com” is relayed to ds214.example.com.
1 | example.com smtp:[ds214.example.com] |
Valid recipients for this domain are configured at /etc/postfix/recipients. In this case, only mail to any “example.com” address is allowed to get relayed.
1 | @example.com OK |
Make sure these files are converted to a binary format.
relayed.
1 | postmap /etc/postfix/recipients |
When relaying outgoing mail (from ds214.example.com), SMTP authentication is used to make sure no unprivileged users use this server as mail relay. In this case, i’ve used saslauthd for authentication. Postfix is advised to use saslauthd and accept “PLAIN” password authentication at /etc/postfix/sasl/smtpd.conf.
1 | pwcheck_method: saslauthd |
Restart Postfix after applying this configuration
1 | service postfix restart |
saslauthd also needs to be configured to accept PLAIN authentication. As the user/pass database, sasldb should be used. This can be done at /etc/default/saslauthd:
1 | START=yes |
Restart saslauthd and make sure the path specified with the -m option can be accessed. This is required since Postfix is supposed to run in a “chroot” environment.
1 | service saslauthd restart |
Now we create a user within sasldb which is used to authenticate a client which is relaying mail through this MTA.
1 | saslpasswd2 -u example.com -a smtpauth mailrelay |
Make sure the user “mailrelay” and the given password is used at the SMTP client, which is ds214.example.com in this case.